How to define a task
Tasks are grouped by organisation identified by codops, for example, debr or sesr.
Behind the scences, a CI pipeline does the following
- extracts code of the algorithm according to the configuration of the task
- distributes dependencies of the task to the cluster
- enfroces cron based scheduling for these tasks as per the configuration
- collecting some basic metrics about task execution (duration, number of successes/failures)
- capturing logs from the task
Prerequisites
To be able to complete this tutorial, you will need to be familiar with PEACH Lab environment.
Write and setup a task
Let's create a simple task that would be executed repeatedly to compute some data and store them to be used quickly from the endpoint.
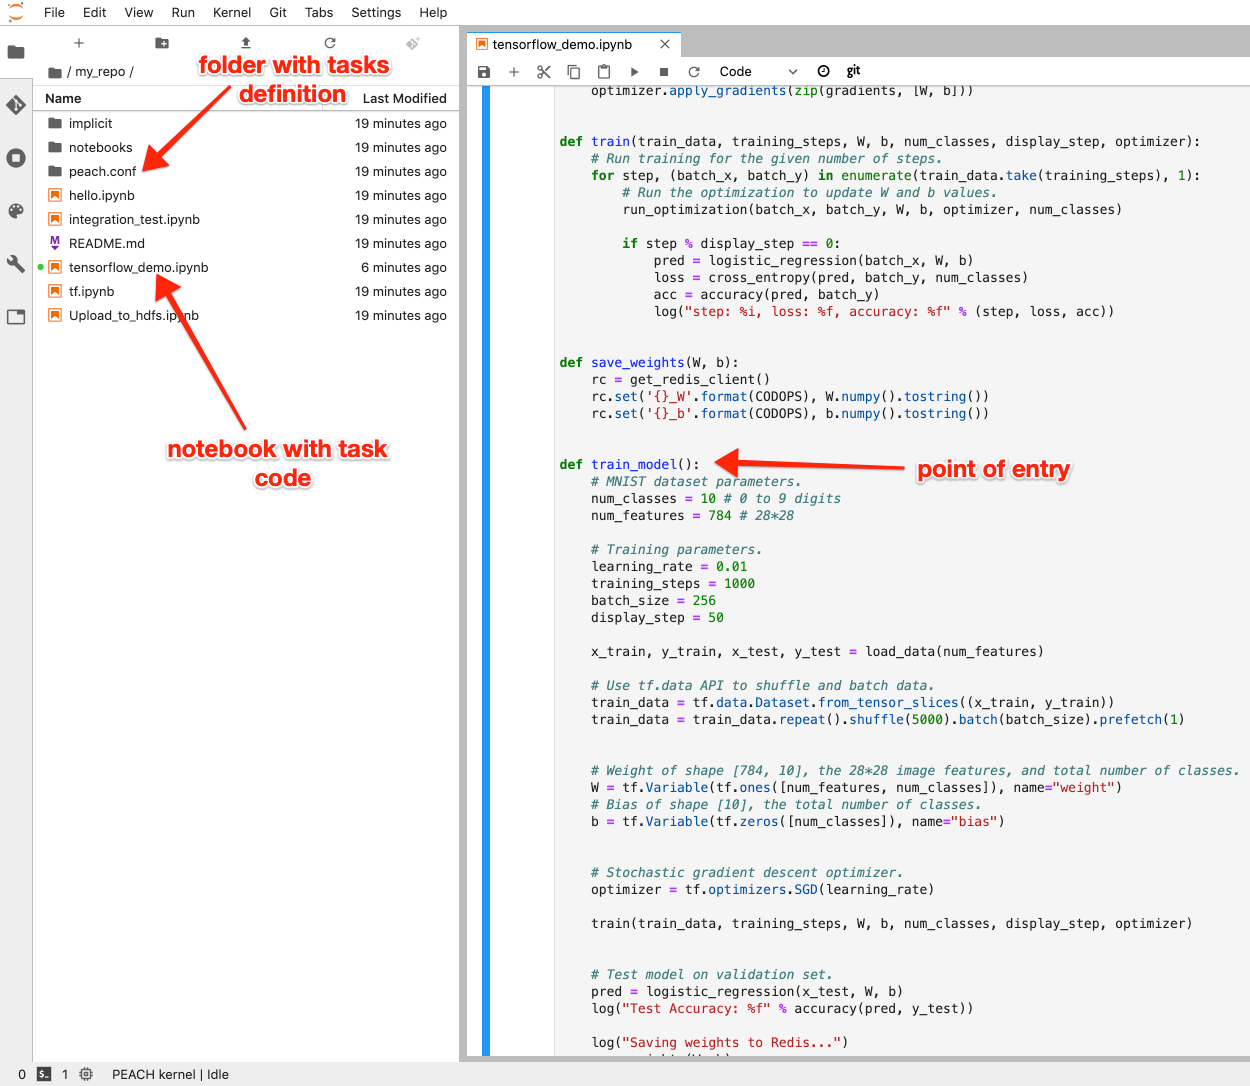
For the purpose of this example here we created a simple code in TensorFlow to train model and then to save computed weights in Redis for the future use from the API endpoints level.
You are free to distribute your code across many cells (you will need to define import of the full notebook using full_notebook, see later) or leave everything in one cell only (function would be picked up automatically with the whole cell). Just don't forget to have your dependencies and supporting code there as well.
Important part is to have an entry function, which would be executed, in our case it's called train_model. You don't have to call this function manually, it will automatically be executed in the task loop.
Registering a task
Now as we have code for our task - it's time to register it in the organizational task loop. There are two ways of registering a task:
-
via creating
peach.yamlfile in the root of repository with definitions of all your tasks -
via splitting your tasks definitions to many
.yamlfiles and placing them in thepeach.confdirectory located in the root of repository
Your repository needs to either have internal access or if private - to have granted access to pipe-jupyter-user user with Reporter privileges
In this example let's try to define our task inside the peach.conf folder. We create tf.yaml file inside the folder with the following content.
codops: default
tasks:
  tf_task:
    notebook: tensorflow_demo.ipynb
    method: train_model
dependencies:
  - tensorflow==2.0.0-alpha0
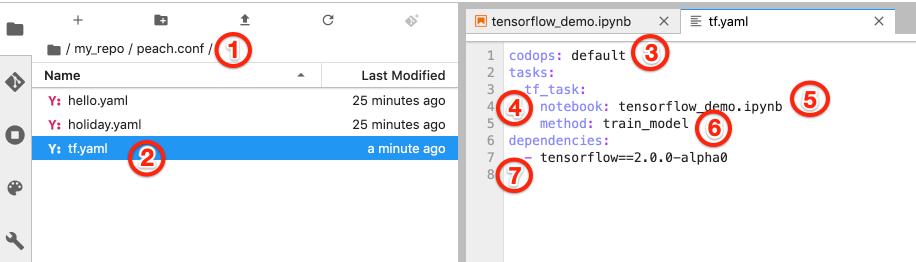
- The file has to be inside
peach.conffolder on the root level, or it can be within the first-level subfolders of thepeach.conffolder - It has be be a YAML file
- On the root level of configuration file organization code has to be defined
- Configuration file needs to have
taskskey, inside which there is embedded key-value structuretask_name: task_definition. It is allowed to define multiple tasks here. In our case we call our tasktf_tasksand nesting all the information about the task inside this key - Relative path to the notebook file with your code
- An entry point function which would be called on execution. Only the cell with the entry point function would be used (use
full_notebook: truehere if you want the full notebook to be used) - Global list of dependencies for all the tasks and endpoints (all tasks per organization are executed in the same enviroment). You may also define a list of dependencies for the tasks only (see example below)
codops: default
tasks:
  tf_task:
    notebook: tensorflow_demo.ipynb
    method: train_model
  dependencies:
    - tensorflow==2.0.0-alpha0
If using only one peach.yaml file - just place all tasks definitions inside this file.
Tasks with arguments
Tasks allow optional arguments, for example:
tasks:
  dependencies:
    - orjson==3.3.1
    - pyarrow

  related_publications_labse:
    executor: python
    notebook: notebooks/zzebu/techebu/related_publication_labse.ipynb
    method: task
    args:
      user: f57246b6-1848-4b1a-a8a2-d8469a050025
      item_id: 35421
      message: "used for testing only"
      my_dict:
        item1: 'message'
        second_dict:
          sub_item1: 8734
          sub_item2:
            - 'test'
            - 23.45

  no_args:
    executor: python
    notebook: notebooks/zzebu/techebu/related_publication_labse.ipynb
    method: task
We defined here 2 tasks, with same code but different arguments. Thus, it allows to conveniently reuse the same code for different tasks.
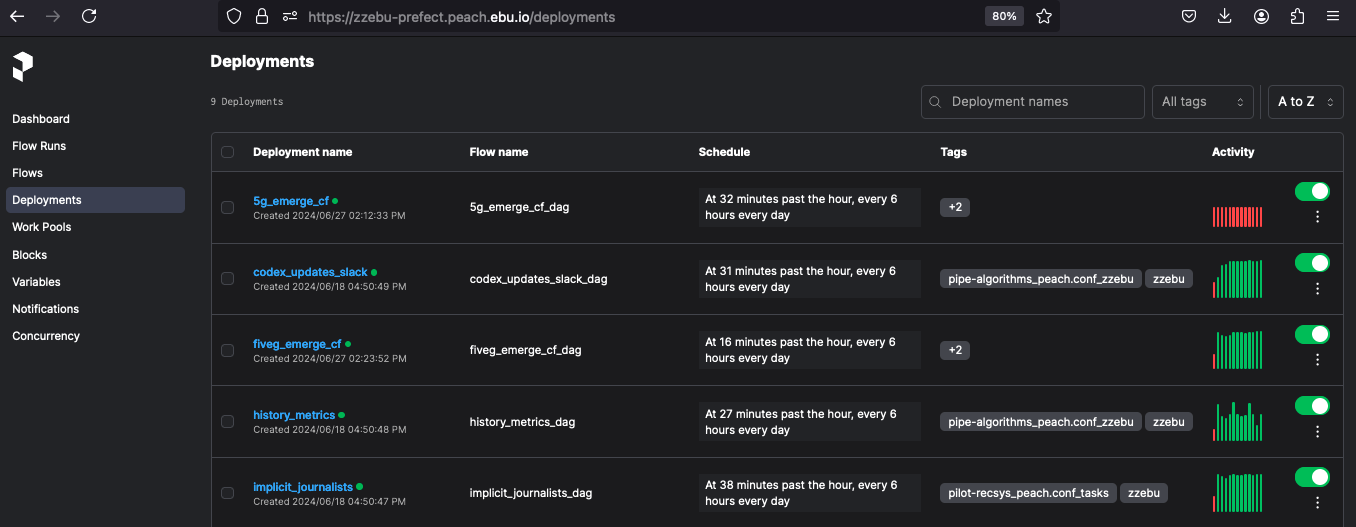
Displaying tasks information
Use prefect to see the status of your tasks. Here you can see the logs, the duration of the task, the status of the task, and the output of the task.
https://prefect.{codops}.peach.ebu.io/
Scheduling tasks with Cron.
Coming soon : how to schedule tasks with cron.
Next steps
Check useful tips and more examples in the lab-tutorials repository.